Guild Image Storage
Guild Image Storage is your server’s shared, centralized image library on SCNX. It allows your entire team to easily upload, organize, and reuse images across all your bot configurations. Say goodbye to the hassle of uploading files to your personal space and having to manually share them with your team!
You'll find Images in your server's navigation sidebar.
Why Use Guild Image Storage?
Whenever you need an image for your Custom Bot or Support Bot—such as a welcome banner, embed thumbnail, or automated attachment—you can pull it directly from your shared server library.
- Team Collaboration: Any trusted admin on your server can view, edit, and delete images from the shared library, ensuring your team can easily maintain the server's branding and assets together.
- Instant Application: Select images directly from a built-in picker while editing your bots, with the ability to seamlessly switch between your shared server library and your personal files.
- Upload Once, Use Everywhere: Upload an image to the server once, and anyone on your team can use it across any bot configuration.
Migrating from Personal Storage
Any extra storage space you previously purchased for your personal space will remain on your personal account. Personal storage cannot be transferred to a server's Guild Image Storage quota. You can continue to use your purchased personal storage as usual. Additionally, please note that you can no longer purchase new storage upgrades for your personal space.
If you have been using SCNX for a while, you are likely familiar with the personal image upload space located at scnx.app/user/file.
Guild Image Storage is a completely separate, shared space. To move your existing images from your personal space to the shared server library, you will need to manually re-upload them.
- Download the images you want to share from your personal space.
- Navigate to your server's Images page.
- Upload the files into the new shared library.
Adding Images to Your Library
There are two ways to get images into your server's library: uploading files or generating them using AI.
1. Uploading Files
When selecting an image to use for a configuration field, you can also directly upload an image to your server's storage:

- Navigate to Images from your server's sidebar.
- Drag and drop your files directly into the upload area, or click the area to open your device's file picker.
- You can upload multiple files at once. Each file will process individually, and a pop-up will confirm if the upload was successful or if an error occurred.
Note: If you upload an identical file that already exists in the library, SCNX will automatically return the existing image to prevent unnecessary duplicates.
File Requirements
To ensure smooth performance, each individual file must be 25 MB or smaller. Larger files will be automatically rejected.
| Format | Allowed Extensions |
|---|---|
| JPEG | .jpg, .jpeg |
| PNG | .png |
| GIF | .gif |
2. Generating Images with AI
Server owners and administrators can disable this feature easily in their server settings. When disabled, the feature won't be visible in the dashboard. Modules that have AI Image Generation features will continue to work and need to be disabled manually if desired.
Need an image but don't have a file ready? You can generate one from scratch using a text prompt right from the Images page.
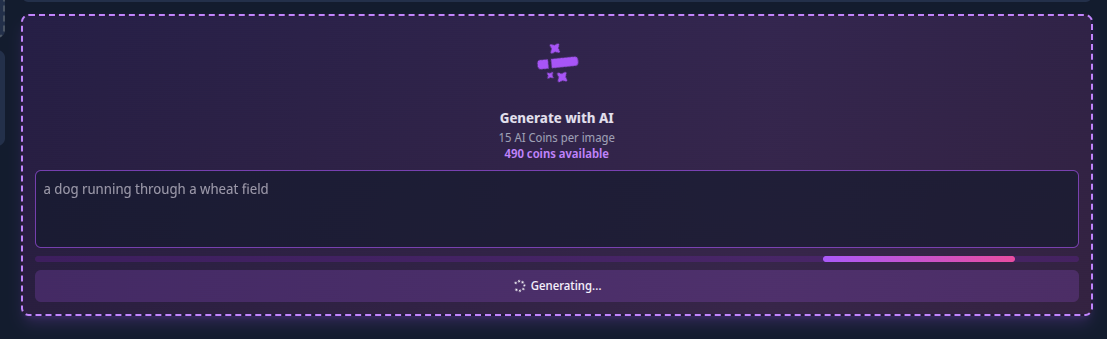
- Locate the Generate with AI box.
- Type in a detailed description of what you want (up to 1,000 characters).
- Click Generate Image.
- The image will automatically appear in your library and will be tagged as
aifor easy filtering.
Important Details for AI Generation:
- Cost: 15 AI Coins per image. If your balance is below 15 coins, generation will be blocked until you purchase more from the SCNX dashboard.
- Dimensions: All generated images are a crisp 1024 × 1024 pixels.
- Content Policy: Prompts violating our safety guidelines will be rejected. You will not be charged AI Coins for rejected prompts.
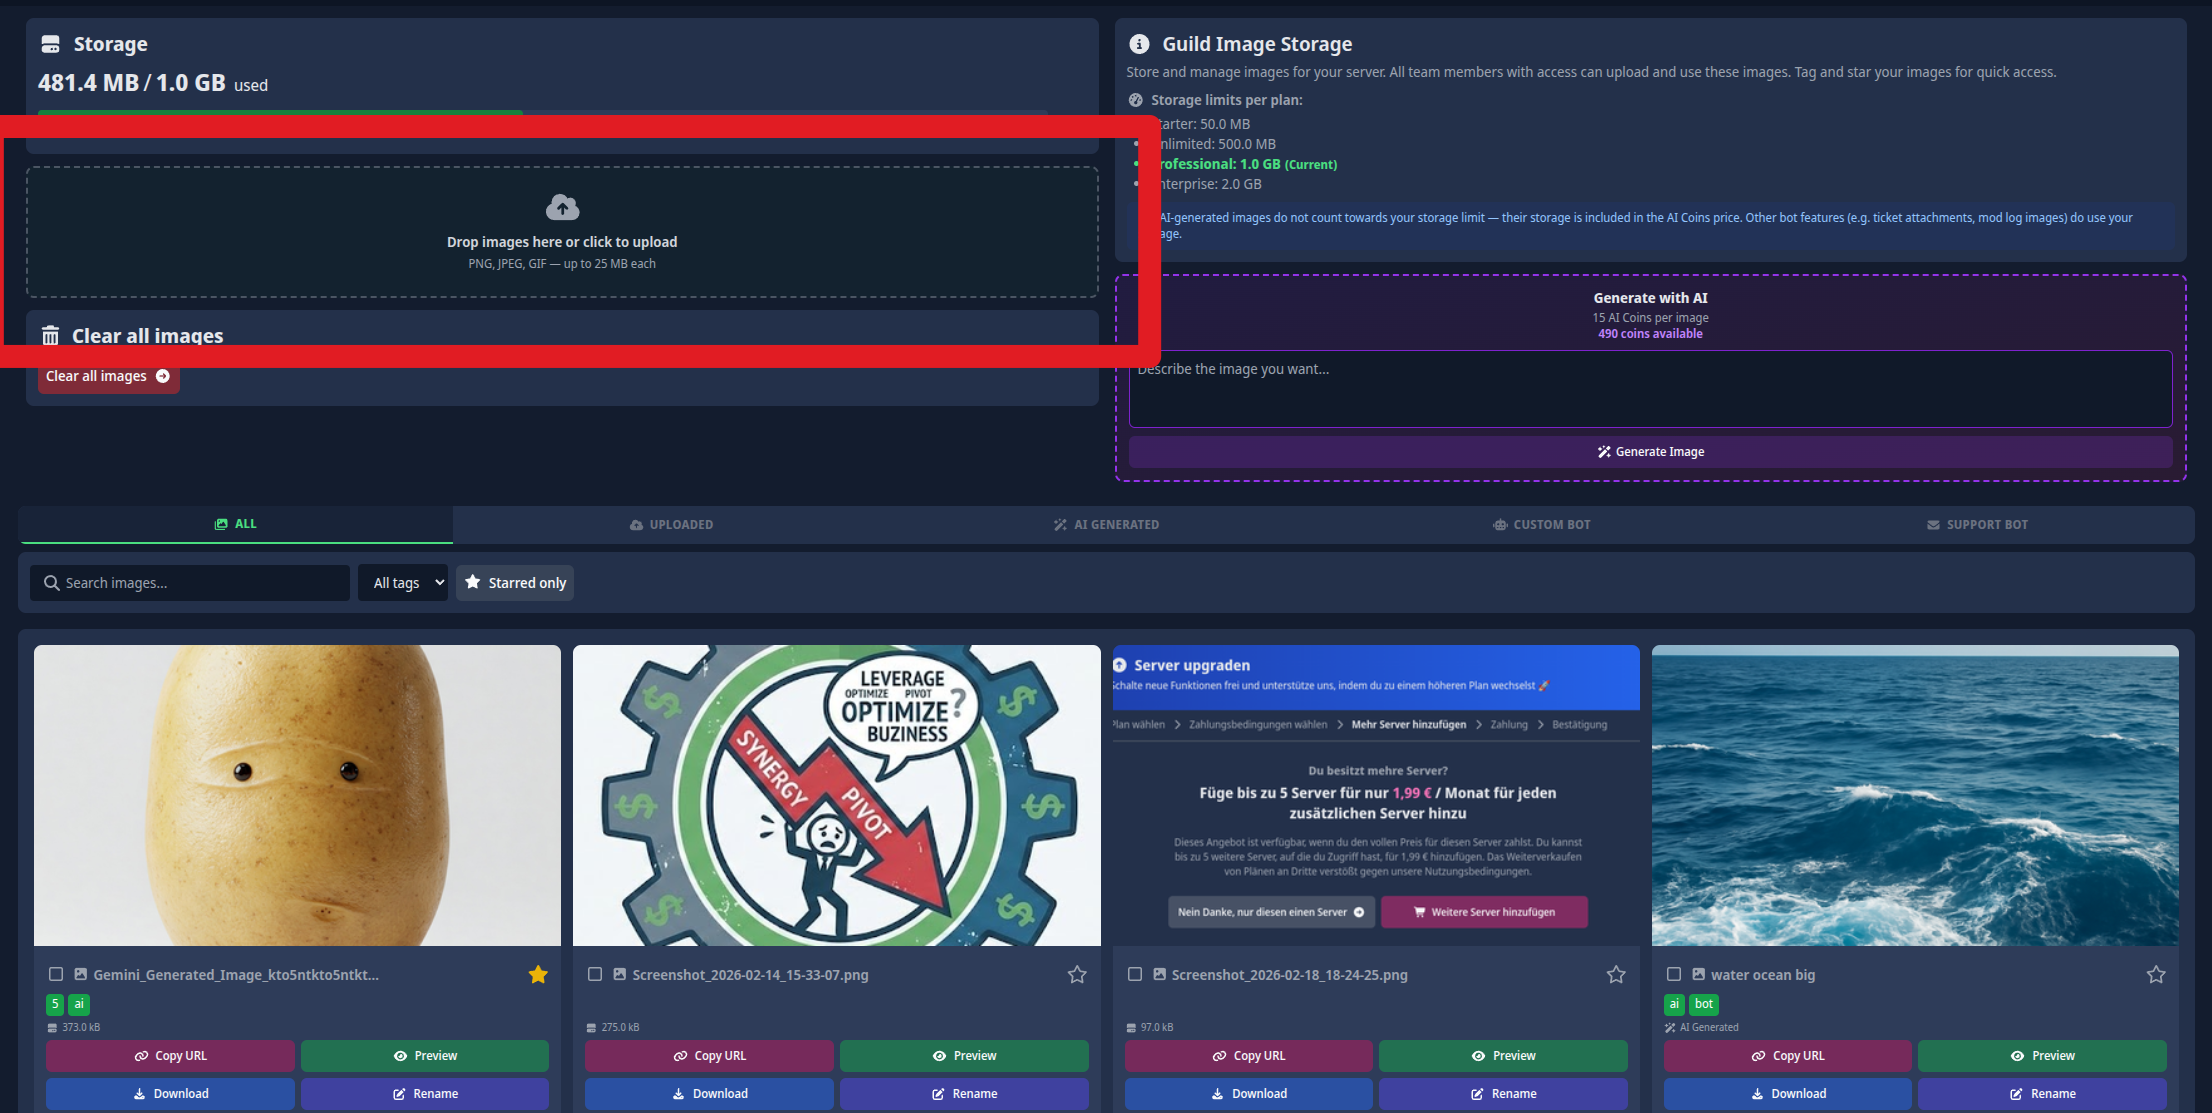
Understanding Storage Limits
Every server has a specific storage quota based on its SCNX plan. You can easily track your usage via the Storage progress bar at the top of the Images page.
Because you use AI Coins to create them, images generated via the SCNX Dashboard AI feature and any Bot AI features do not take up any of your server's storage quota.
Images that your Custom Bot or Support Bot saves automatically (for example, ticket attachments or mod-log screenshot proofs) do count towards this storage limit. You can usually disable these features in the affected modules if you do not wish to use the guild storage.
| SCNX Plan | Total Storage |
|---|---|
| Starter | ~50 MB |
| Unlimited | ~500 MB |
| Professional | ~1 GB |
| Enterprise | ~2 GB |
If your server hits its storage limit, new uploads will be blocked until you either delete older images or upgrade your server's SCNX plan. If a bot tries to upload an image, it will also fail, resulting in no image being uploaded.

Organizing and Finding Your Assets
As your library grows, finding the right image quickly is crucial. SCNX gives you several tools to keep things tidy.
Organization Tools
- Tags: Group your images by campaign, season, or bot module. You can add up to 10 tags per image (max 30 characters each). Use the Edit Tags button on an image card to manage them. Clicking a tag instantly filters your entire library.
- Display Names: Give your images recognizable names! By default, the system uses the original filename, but you can change it to something clear (up to 100 characters) using the Rename button.
- Starring (Favorites): Click the ★ icon on any image to star it. Starred images are pinned to the top of your library for instant access.
Searching and Filtering
Use the filter bar above the image grid to narrow down your view. You can combine these filters to find exactly what you need, and hit Clear filters to reset your view.
| Tool | What it does |
|---|---|
| Search Bar | Searches for matching text in the display name or the original filename. |
| Filter by Tag | Displays only the images that have a specific tag applied. |
| Starred Only | Hides everything except your favorited (starred) images. |
| Type Tabs | Filters images by how they were created: All, Uploaded, AI Generated, Custom Bot, or Support Bot. |
Note: To keep loading times fast, the library displays 25 images per page. Use the Previous / Next buttons at the bottom to navigate.
Managing and Deleting Images
Every image card features a quick-action menu to help you manage your files.
| Action | What it does |
|---|---|
| Copy URL | Copies the direct CDN link to your clipboard. |
| Preview | Opens a full-sized preview of the image. |
| Download | Downloads the original image file directly to your current device. |
| Rename | Changes the image's display name. |
| Edit Tags | Allows you to add or remove organizational tags. |
| Star / Unstar | Pins or unpins the image to the top of the library. |
| Delete | Permanently removes the image. |
Deleting Images
The Clear all images button in the left sidebar will instantly and permanently delete every single image in your server's library.
This includes images currently being used by your bots! Only do this if you are absolutely sure you are not breaking any active bot setups.
While an image is immediately removed from your library view, it may take up to 24 hours for it to be fully purged from all systems and caches. During this time, the image might still load where it was previously linked. Content sent on Discord might load longer, unless you delete messages with the image manually.
You can free up storage space by deleting images you no longer need.
- Single Delete: Click Delete on any individual image card.
- Bulk Delete: Click the checkbox on multiple image cards (a blue ring will appear). A bar will pop up at the top showing your selection count. Click Delete selected. (Maximum 50 images at a time).
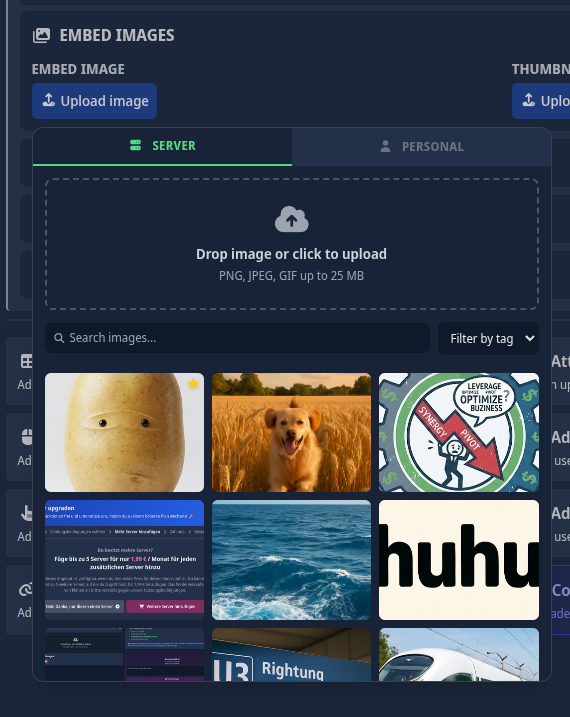
How to Use Your Images in Bot Configurations
Whenever you edit an image field (like a thumbnail or banner) in your Custom Bot or Support Bot config, the image picker now gives you access to both your personal and server files.
From within the picker you can:
- Switch Tabs: Easily toggle between your Server Images (shared) and your Personal Images.
- Browse and Filter: Search the shared server library and filter by tag.
- Select instantly: Click an image, and its URL will automatically populate into the configuration field.
- Upload Directly: No need to leave the page! Click the upload button or drag-and-drop a new file straight into the picker. The image will upload directly to whichever tab you currently have open (Server or Personal) and will be selected immediately.