Set up your Custom-Bot
Easily create your very own Discord-Bot on SCNX. Setup only takes a few minutes.
Included in these plans
0. Pre-Flight-Checklist 🛫
Before you can create your Custom-Bot on SCNX, please make sure that
- you have added your Server to SCNX.
- you are the owner, a trusted admin with the Co-Owner permission or an administrator of the server you want to enable this feature.
- you've got a few minutes time (our estimate is that this takes around two minutes to finish on a computer, on mobile it may take a bit longer) to finish this guide - don't stop in the middle; your progress won't be saved.
1. Create your Discord-Application & -Bot 🤖
Do not reuse an existing application. You'll need a new application for your Custom-Bot. SCNX does not support running Modmail and Custom-Bot and another, third-party Bot (like txadmin) with the same token / application - please create a new one for each bot.
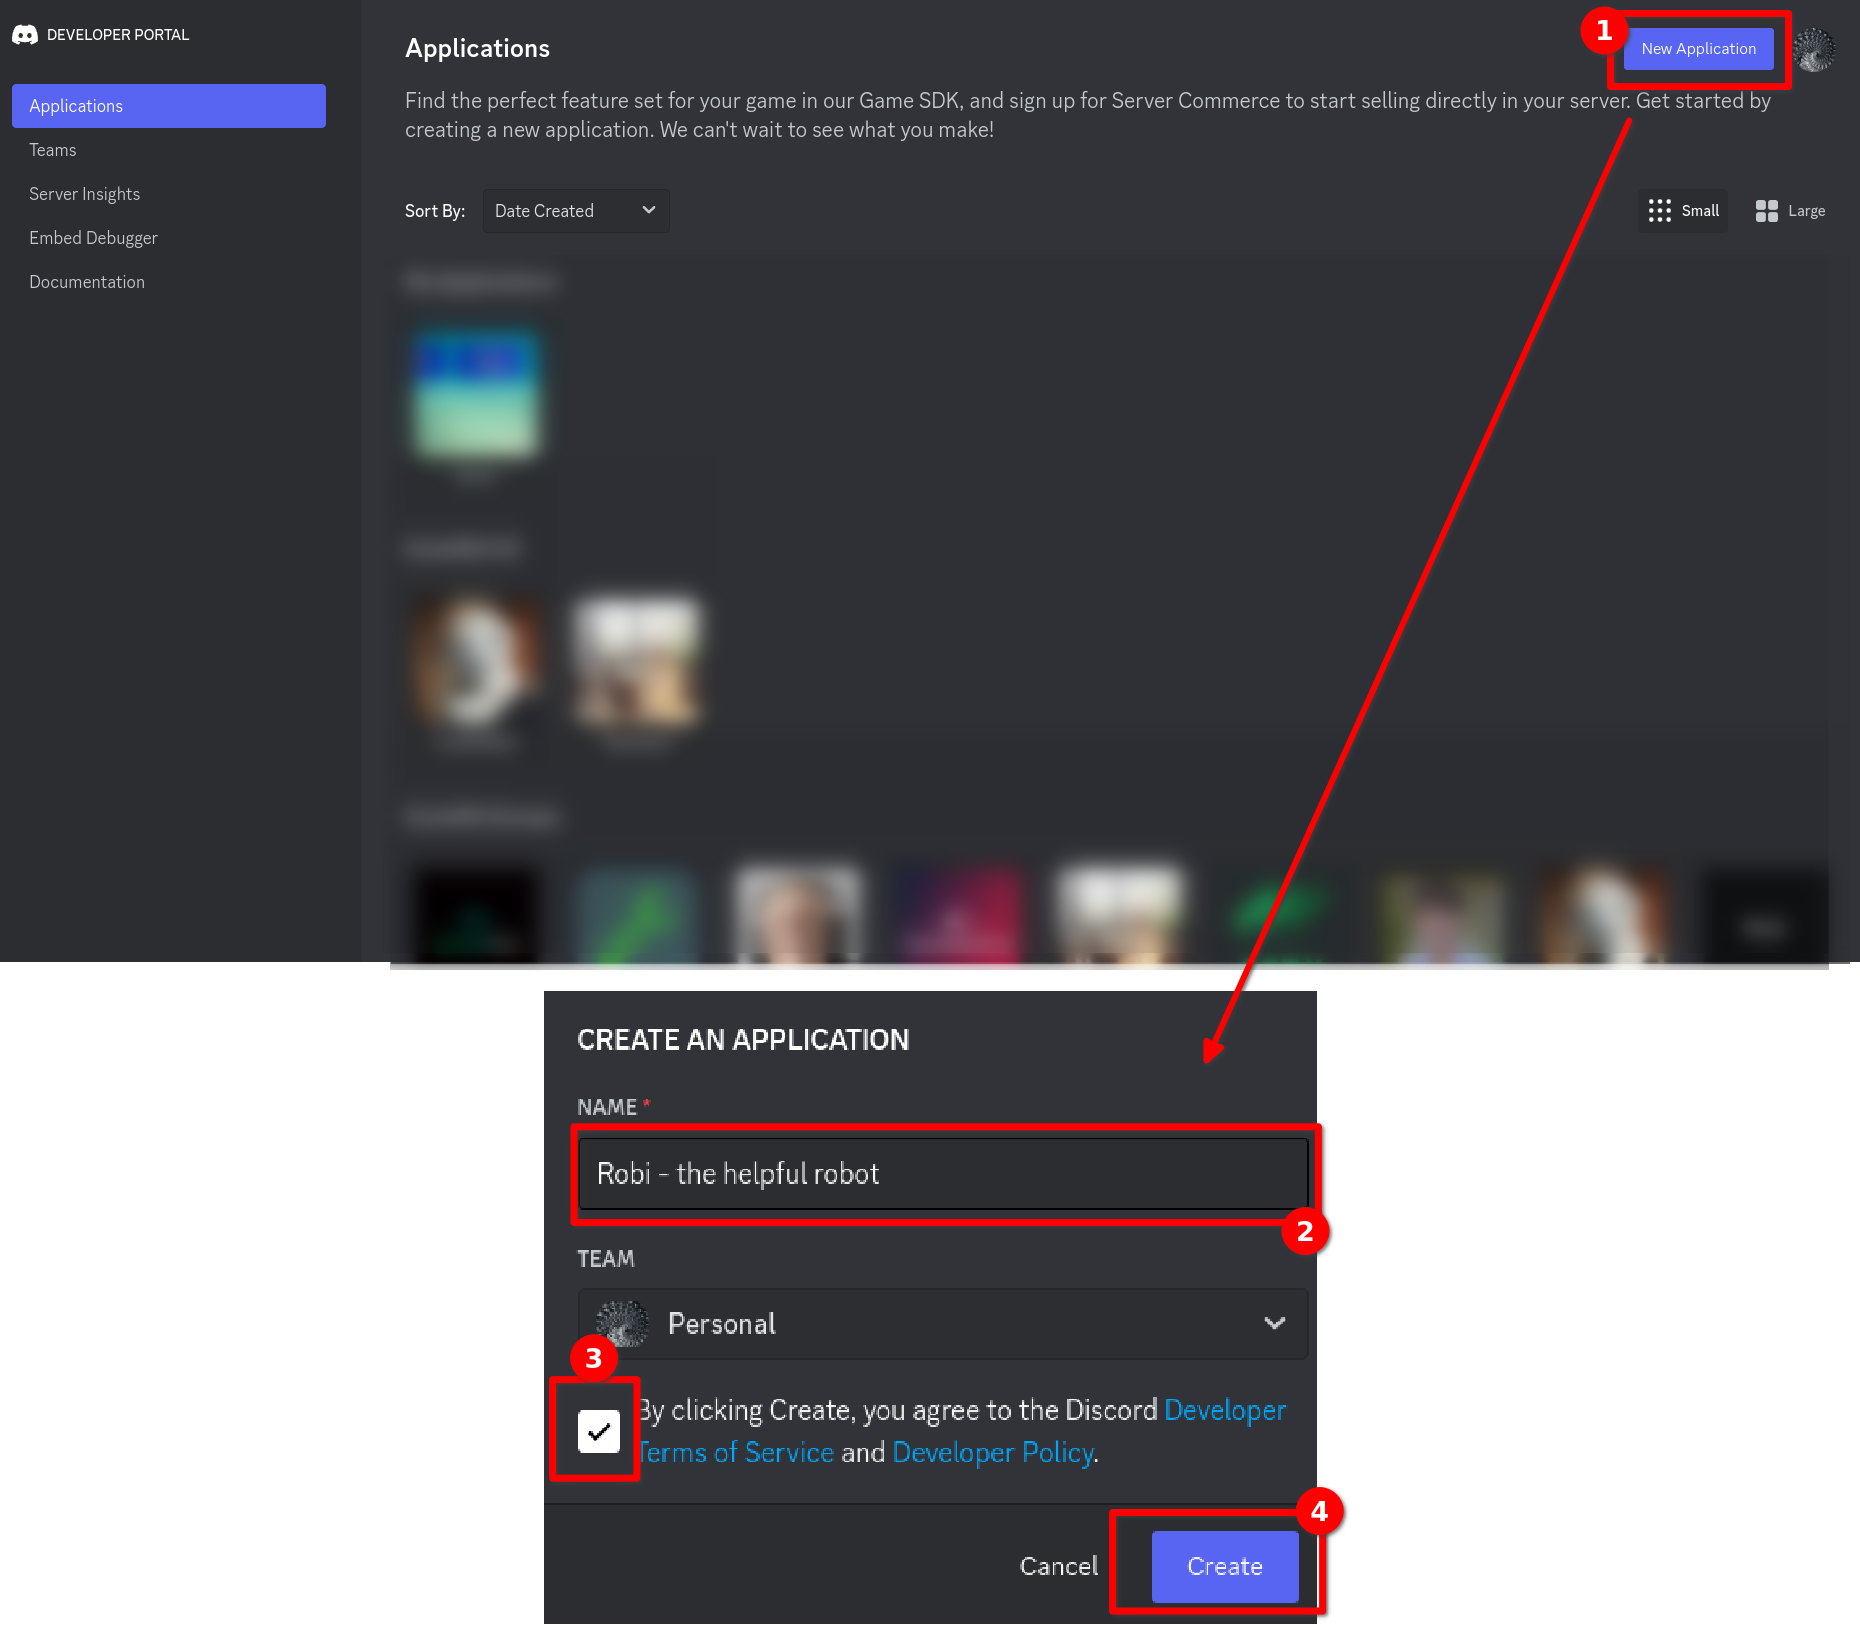
First, visit the Discord Developer Portal. There, create a new application by clicking on "New Application" on the upper-right side of your Developer Portal. A modal will open. Enter the name of the application (you can change this later), read & accept the Discord Developer Terms of Service and the Discord Developer Policy (these policies also apply to your use of the Discord API as part of SCNX) and create your bot by confirming with "Create".
Next, open the "Bot"-Settings in the navigation bar on the left-hand side. There, you can configure the avatar and username - you don't need to, as you can also do this directly on SCNX and get prompted to do so when your bot got created.
The final step in the Developer Dashboard is to generate a token and copy it. To do so, open the "Bot" page of your application and click on "Reset token" (still on the Bot page) and confirm your request in the modal. You might get asked to enter a 2FA-Code for your Discord-Account.
Once done, please copy the token of your bot. You'll need it in the next step.
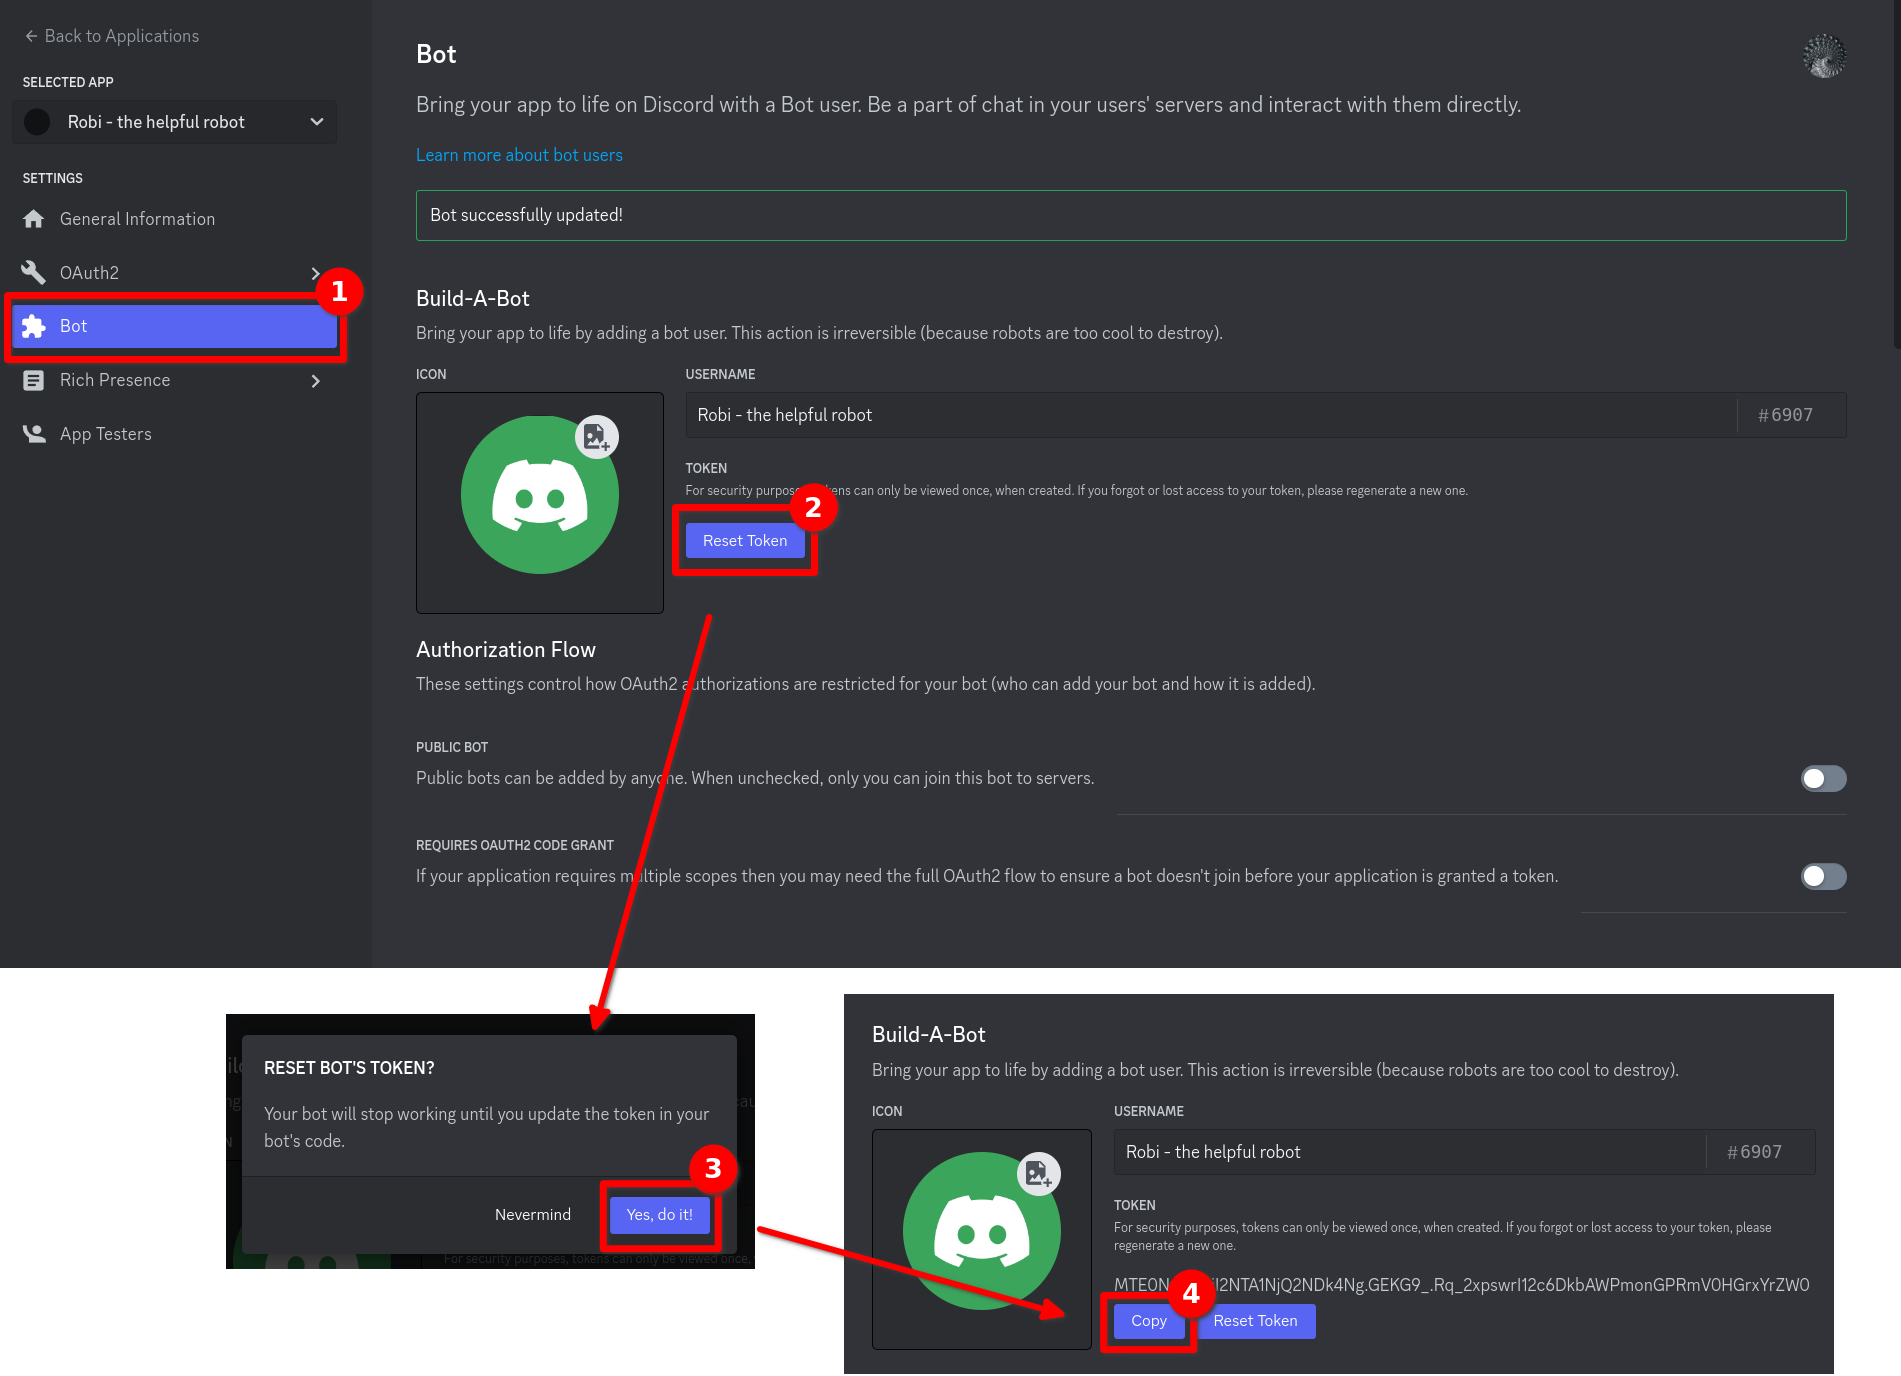
Only paste your token in the Dashboard. Never send a token to another user, trusted-admins or a member of our staff. Treat tokens like a password - users with access to your token are able to use your bot to perform harmful actions.
2. Create your Bot on SCNX 🚀
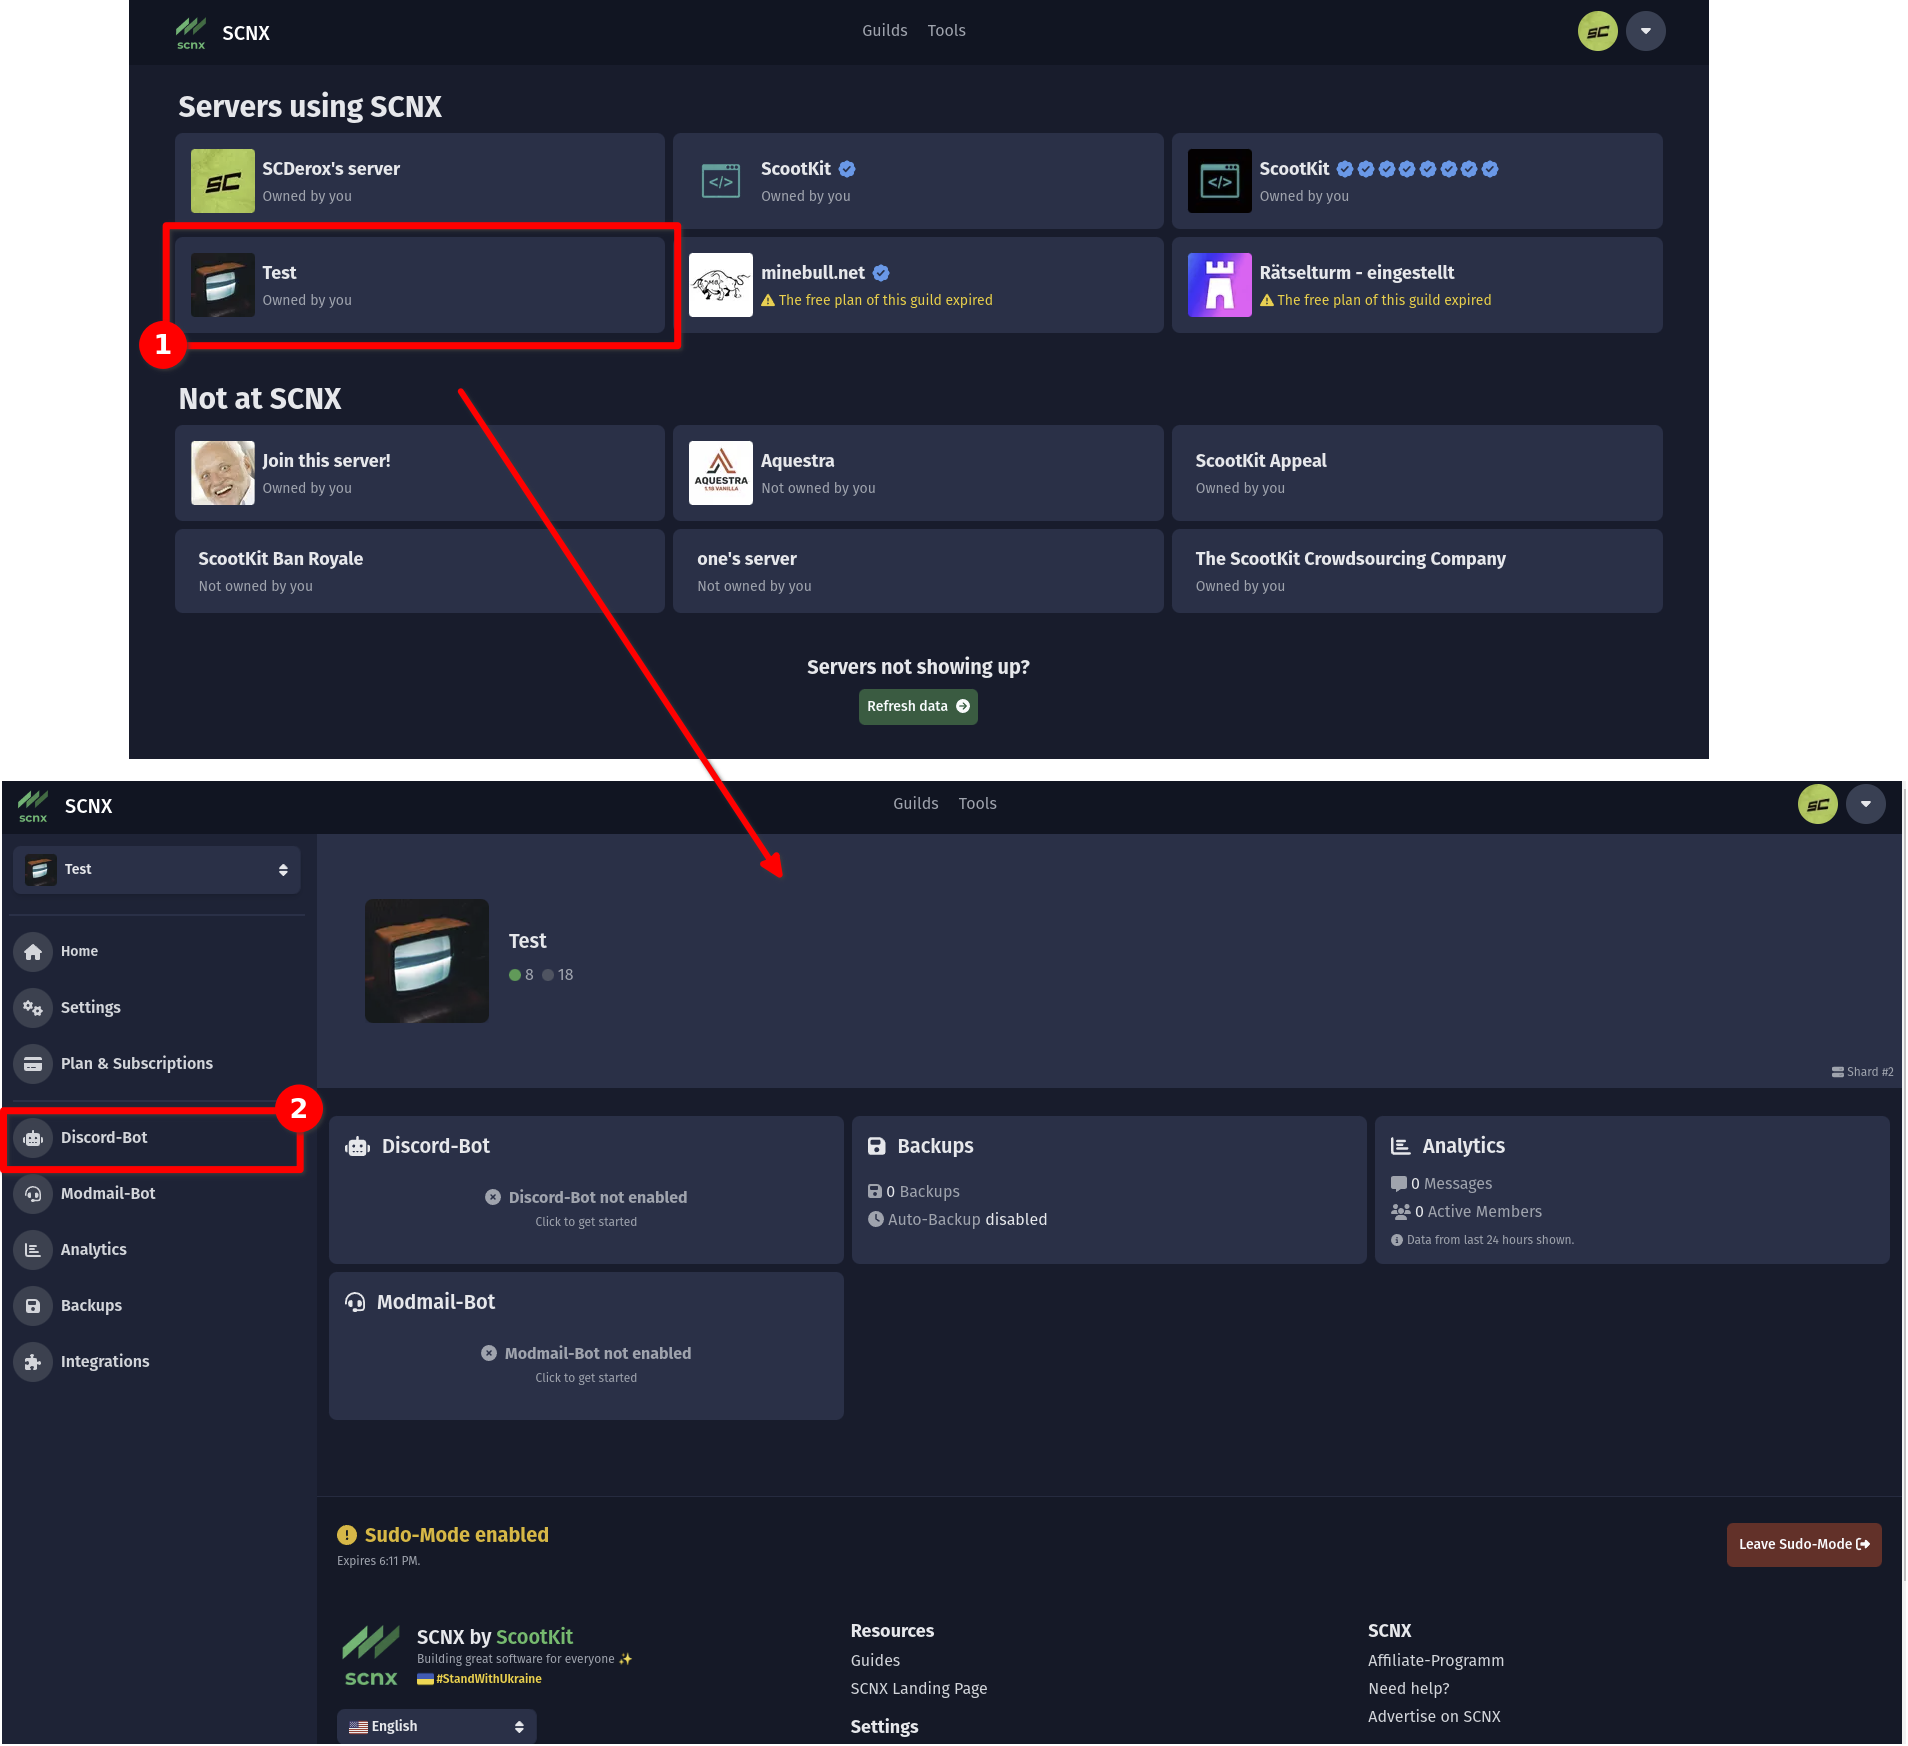
Open the SCNX Dashboard and select the server you want to create the bot for. Next, select "Discord-Bot" in the sidebar.
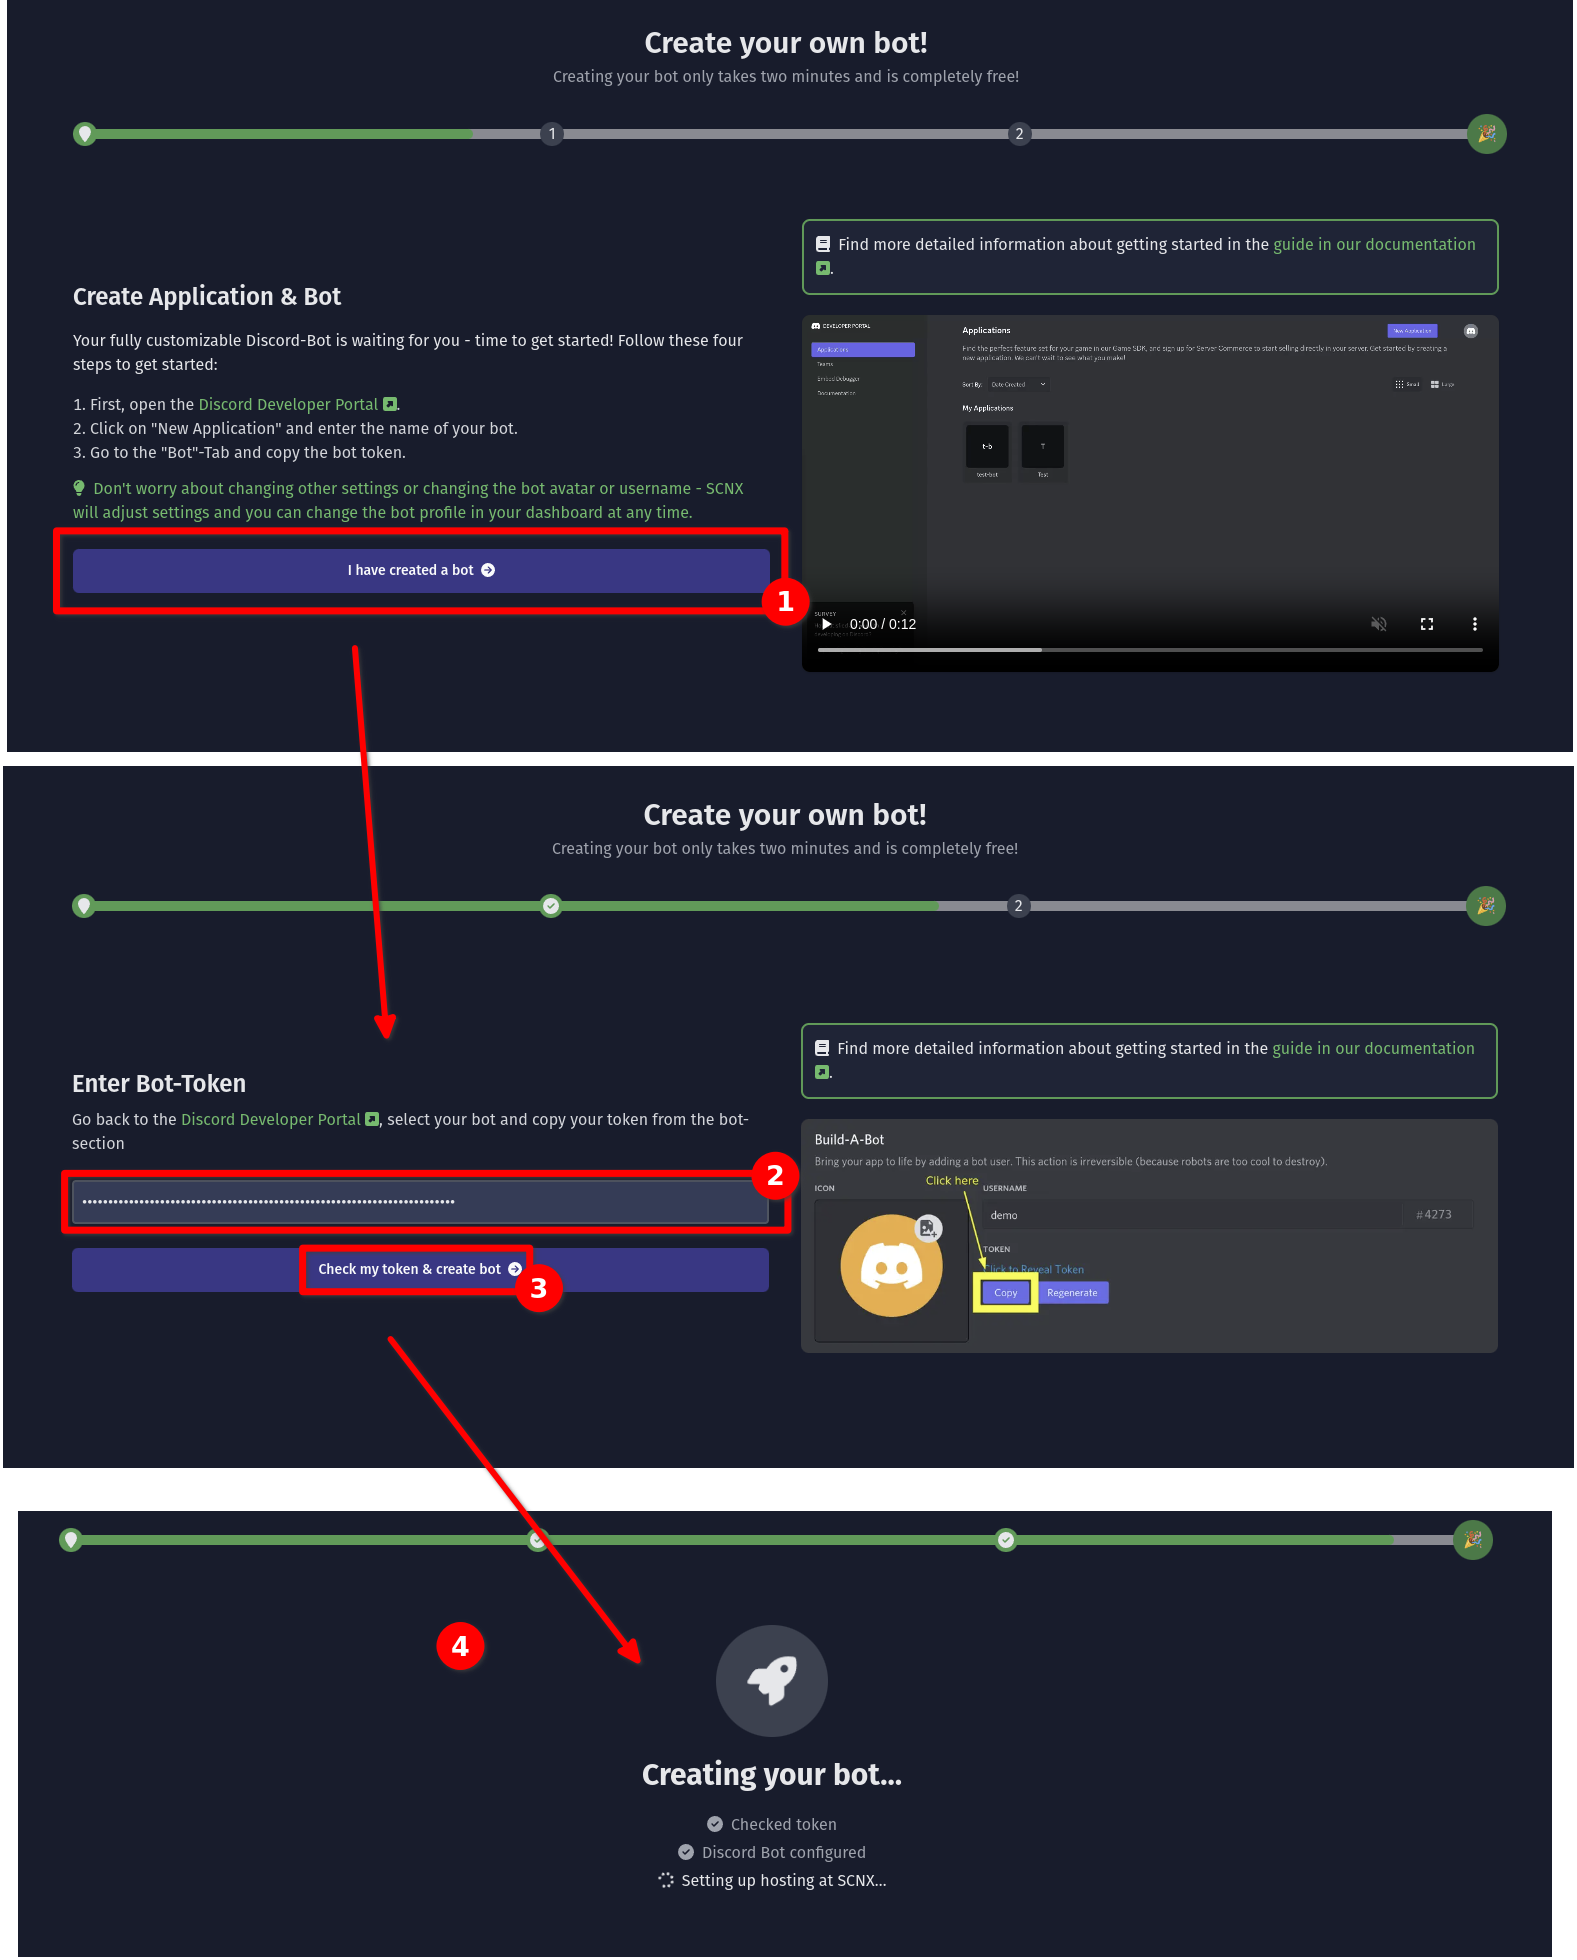
You'll find a video showing how you should create the Discord-Bot. If you've followed this guide, you can confidently skip this using the "I have created a bot"-button. Next, you'll be asked to enter the token you obtained in step 1. Do this and click on "Check my token & create bot". SCNX will now verify your token, configure the Discord-Bot for you and set up hosting at SCNX - this might take a few seconds.
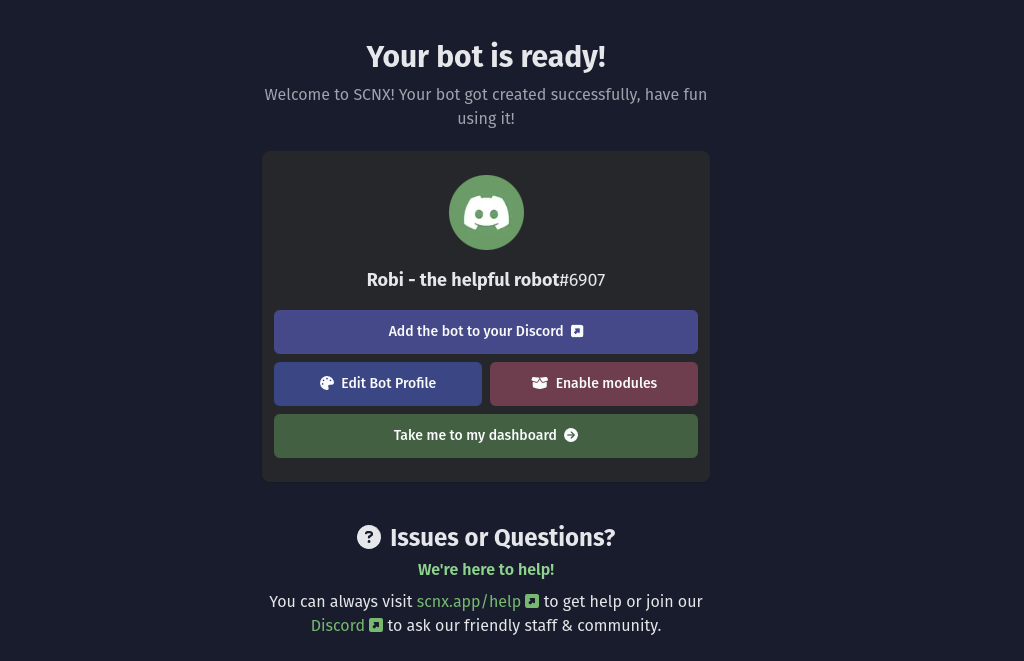
Once SCNX has set up your bot, you'll need to invite your bot to your server. To do this, you only need to click on the "Add the bot to your Discord"-Button. This will open Discord's OAuth2 Grant Screen (that's how nerds call the screen below 🤓). SCNX already selected your server for you. Simply click "Continue" and "Authorize" to finish the process. If you want, you can remove the "Administrator" permission, but this will make it more difficult to use the bot down the line, as SCNX is not yet able (the nerds are still working on this 🤓) to show which feature needs what permissions and handle permission-related error correctly.
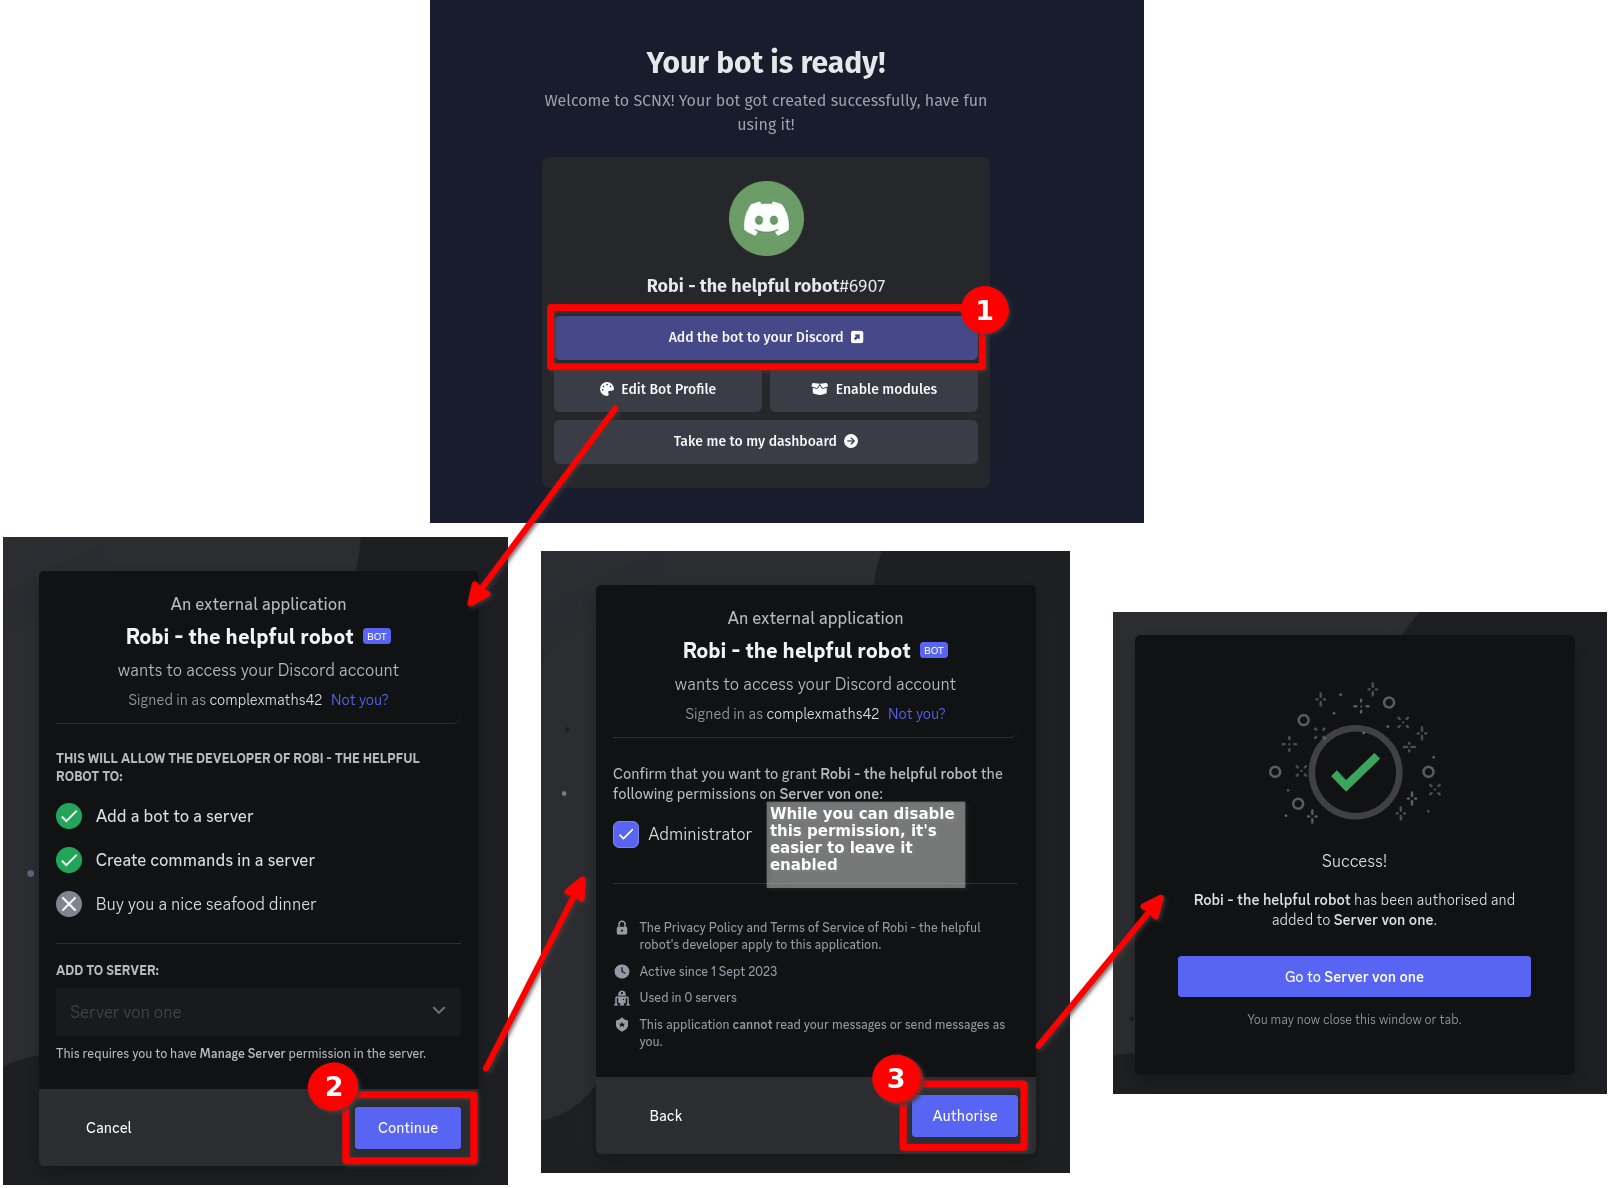
Once this is done, your bot is fully ready to use SCNX. Return to the setup flow to edit the bot profile with the "Edit profile" button (you can also do this later), enable modules or explore all features your bot.
We have a troubleshooting guide for Custom-Bots ready for you. If that didn't help, we're always happy to help, just visit scnx.app/help.
3. Celebrate your new Bot 🎉
If you did everything right, your bot should now be online on Discord. Pat yourself on the back. You did a great job and are now ready to explore the universe of a highly-customizable Discord-Bot for your community - not just a Discord-Bot, your Discord-Bot.
Here are a few things you can do now:
- enable a few of the many Custom-Bot-Modules.
- use Bot-Log-In to create messages with Self-Roles and more.
- create Custom-Commands to do fun things.
- configure the behavior of your bot.
- and much more, open the Custom-Bot Documentation to view every option.