Wie du deinen Modmail-Bot einrichtest
Richte den weltweit fortgeschrittensten Modmail-Bot ein und das in nur ein paar Minuten!
In diesen Plänen enthalten
0. Bevor du loslegst
Bevor du deinen eigenen Modmail-Bot auf SCNX erstellen kannst, stelle sicher, dass
- du deinen Server zu SCNX hinzugefügt hast.
- dein Server einen bezahlten Unlimited Plan (4,99 € / Monat) oder den Professional (7,99 € / Monat) Plan besitzt oder du die Testphase verwendest, sofern diese für dich verfügbar ist.
- du der Besitzer des Servers, ein Trusted-Admin mit der Mitbesitzer-Berechtigung oder ein Administrator bist, auf dem du diese Funktion aktivieren möchtest.
- du ein paar Minuten Zeit hast (es sollte ca. 2 Minuten dauern) um diese Anleitung zu beenden - hör nicht in der Mitte auf; dein Fortschritt wird nicht gespeichert.
1. Erstelle deine Discord-Anwendung & -Bot 🤖
Verwende keinen bereits existierenden Bot. Du benötigst eine neue Anwendung für deinen Modmail-Bot auf SCNX. SCNX unterstützt es nicht, mehrere Bots (wie den Discord-Bot und den Modmail-Bot oder auch Tokens von Bots aus anderen Unternehmen, wie txadmin) mit demselben Token / mit der gleichen Anwendung zu verwenden - Bitte erstelle für jeden Bot eine neue Anwendung.
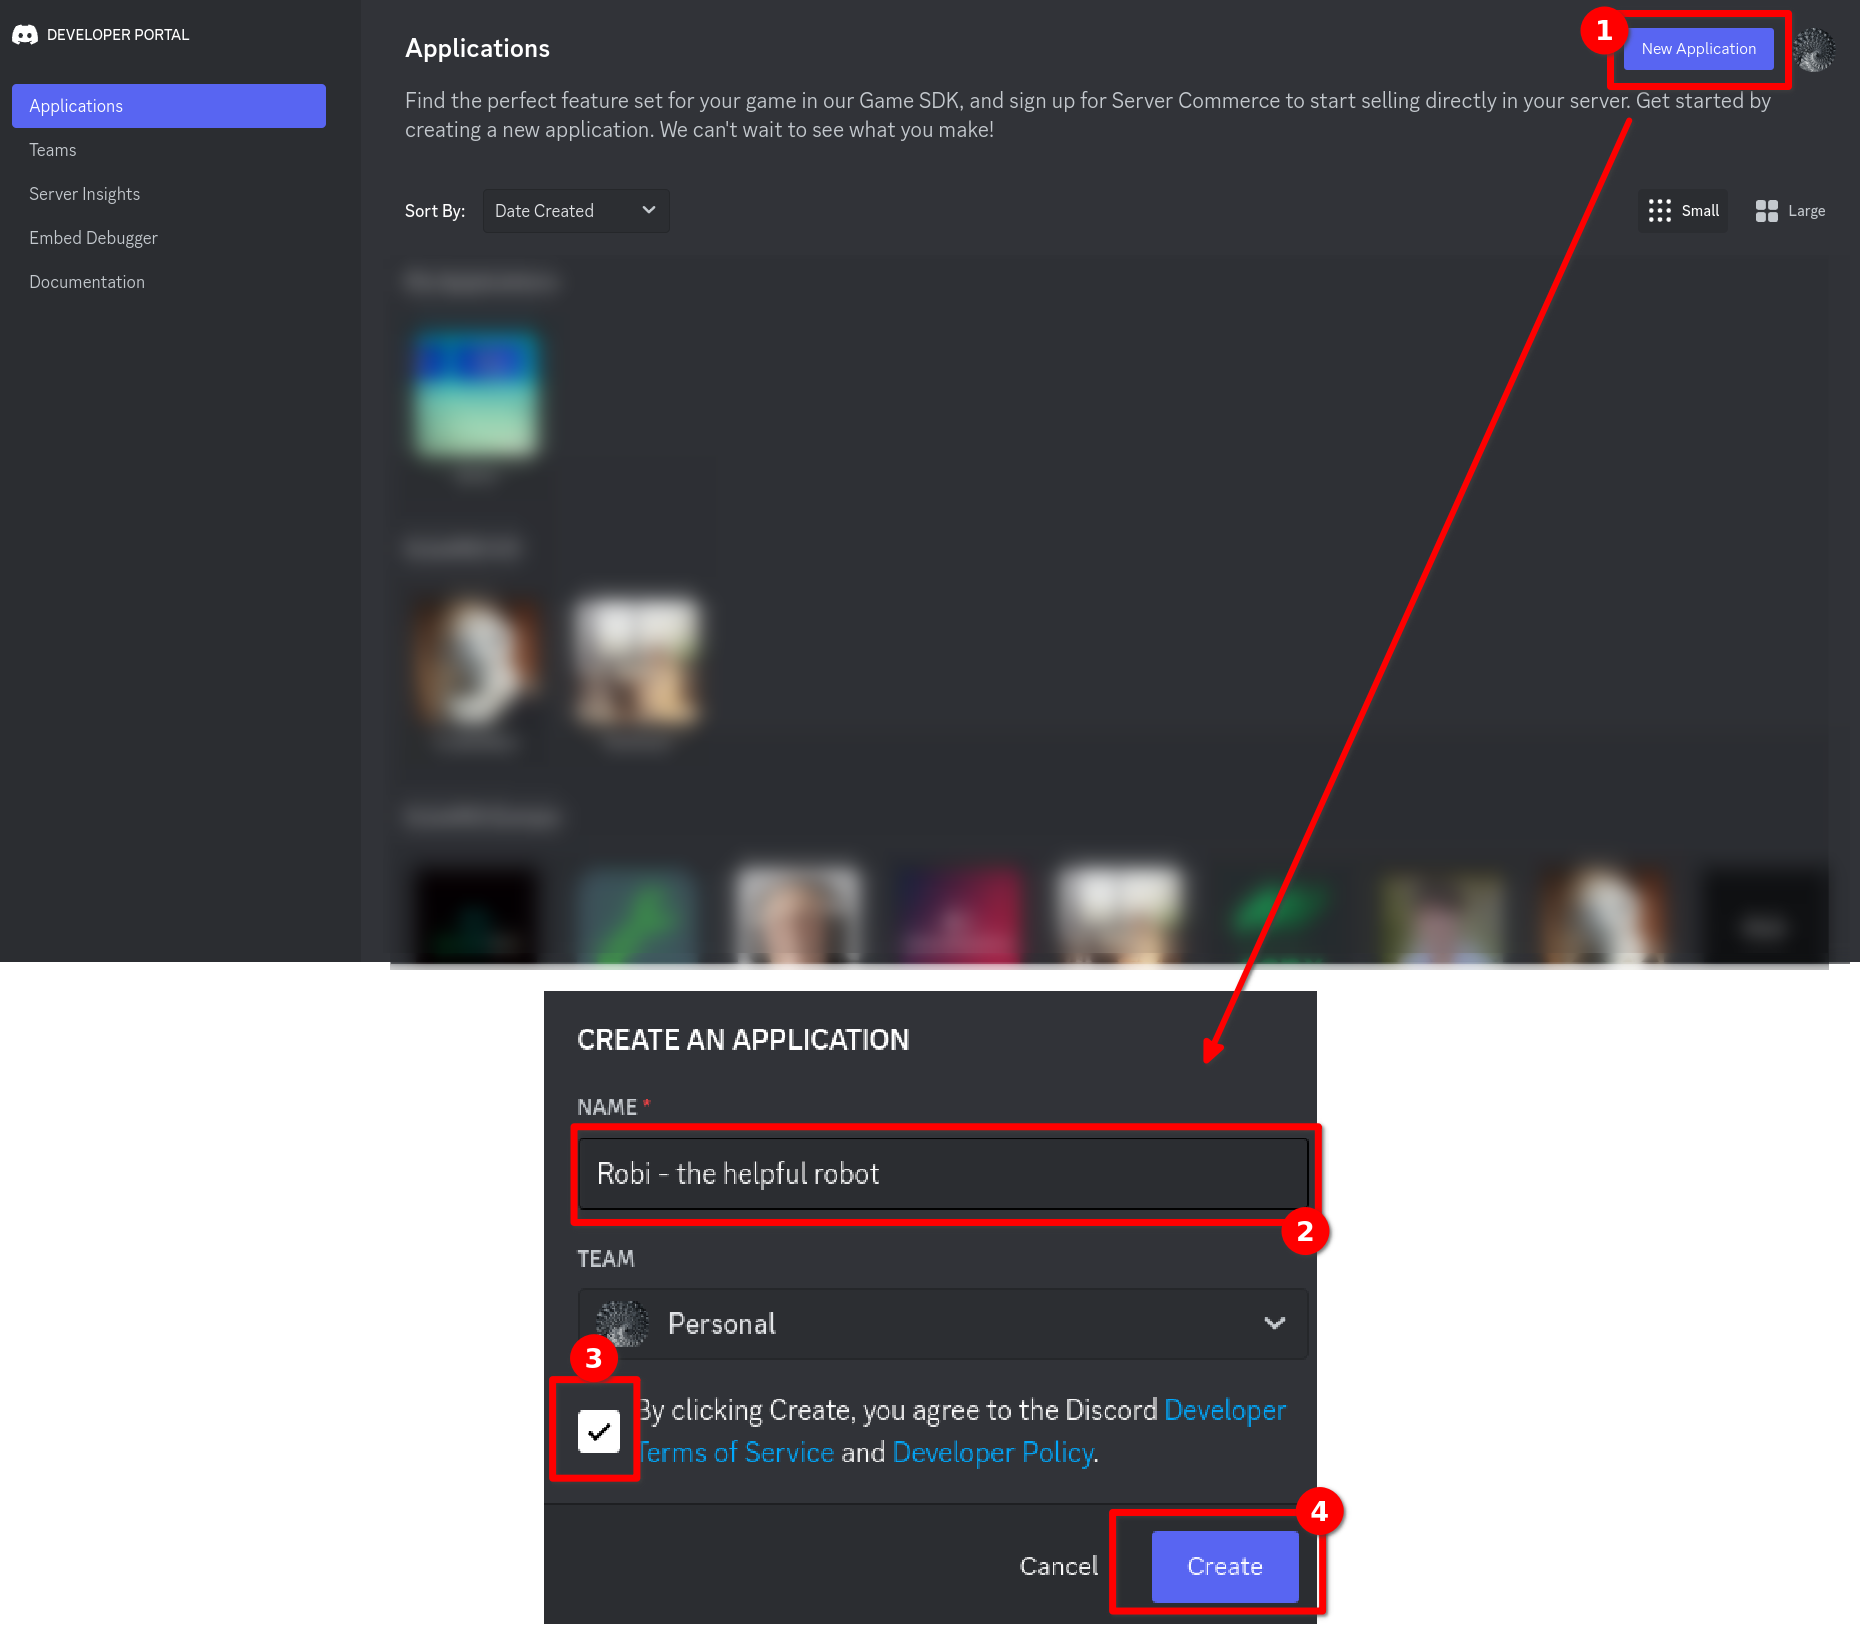
Als Erstes öffnest du das Discord Developer Portal. Dort kannst du eine neue Anwendung erstellen, indem du auf "Neue Anwendung" oben rechts in deinem Developer-Portal klickst. Nun wird sich ein Fenster öffnen. Gib den Namen, wie der Bot später heißen soll an (du kannst ihn aber jederzeit später ändern), Lese und akzeptiere die Discord Developer Terms of Service und die Discord Developer Policy (diese Richtlinien gelten auch für deine Nutzung der Discord API als Teil von SCNX) und erstelle den Bot, indem du auf "Erstellen" klickst.
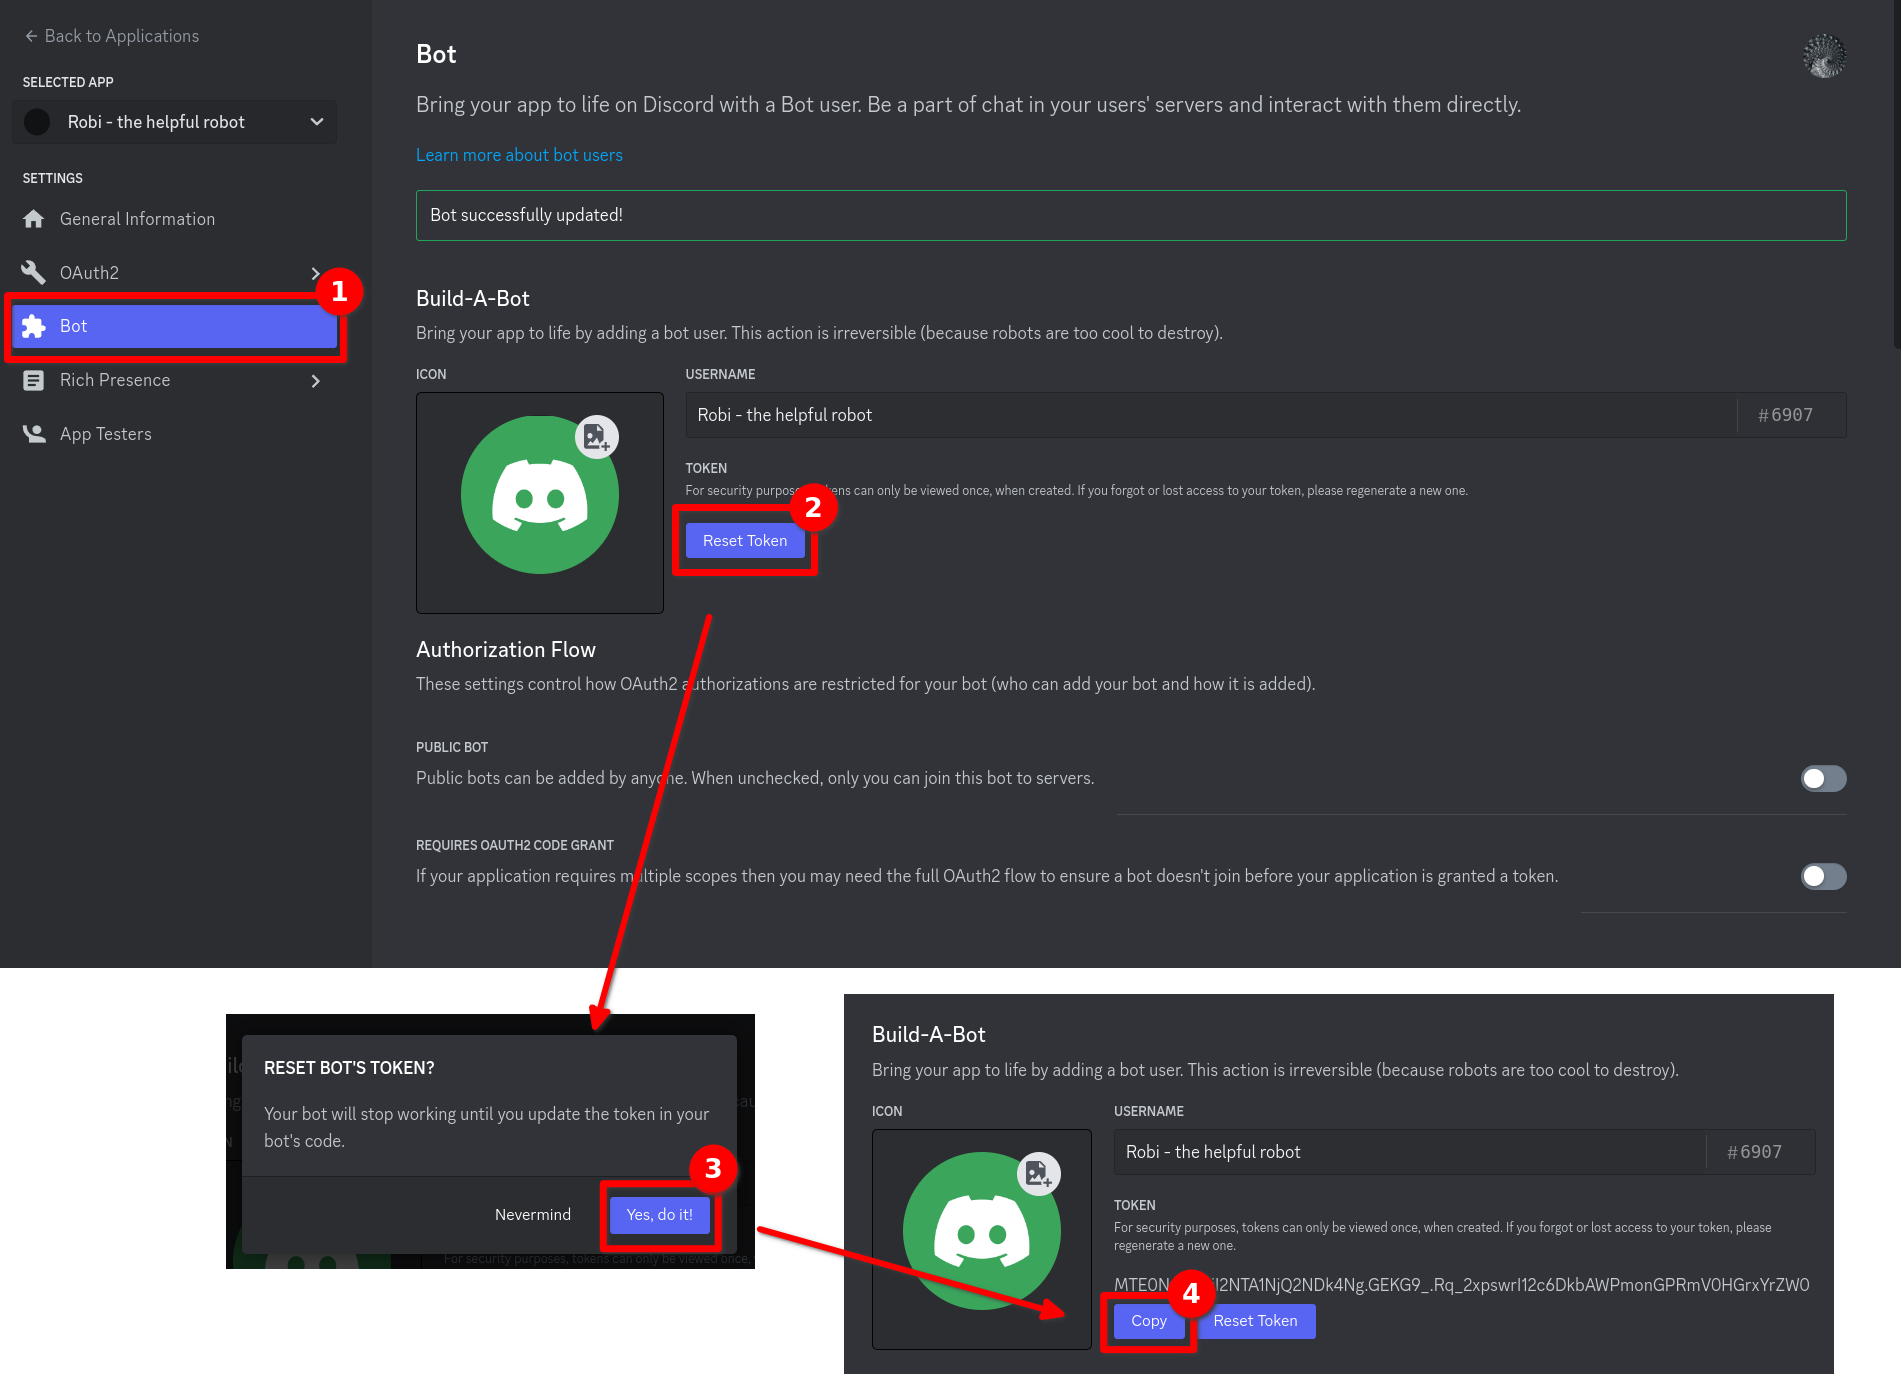
Als Nächstes öffnest du die "Bot"-Einstellungen in der Navigation-Bar auf der linken Seite. Dort kannst du den Avatar und den Benutzernamen einstellen – das musst du nicht, denn das geht auch direkt bei SCNX; bei Erstellung deines Bots werden wir dich auch dazu auffordern, dies zu tun. Der letzte Schritt im Discord Developer Portal ist einen Token zu generieren und diesen zu kopieren. Um dies zu tun, öffne die "Bot" Seite in der Navigation-Bar auf der linken Seite und klicke auf "Token zurücksetzen" und bestätige deine Anfrage in dem Fenster, das sich gerade geöffnet hat. Es kann sein, dass du nach dem 2FA-Code für deinen Discord-Account gefragt wirst.
Wenn dies fertig ist, kopiere bitte den Token von deinem Bot. Du wirst ihn gleich benötigen.
Füge deinen Token nur im Dashboard ein. Sende niemals deinen Token an einen anderen Nutzer, Trusted-Admin oder an einen unserer Team-Mitglieder. Dein Token ist wie ein Passwort - Nutzer können mit deinem Bot alles machen, wenn sie den Token haben. Falls du deinen Token doch aus Versehen weitergegeben hast, setze sofort den Token im Developer Portal zurück.
2. Erstelle deinen Modmail-Bot auf SCNX 🚀
Öffne das SCNX Dashboard und wähle den Server aus, für den du den Modmail-Bot erstellen willst. Als Nächstes wähle "Modmail" in der Seitenleiste aus. Du wirst ein Tutorial finden, wie man den Discord Bot erstellen sollte. Wenn du dieser Anleitung gefolgt bist, kannst du das Video überspringen, indem du auf den "Ich habe einen Bot erstellt"-Button klickst.

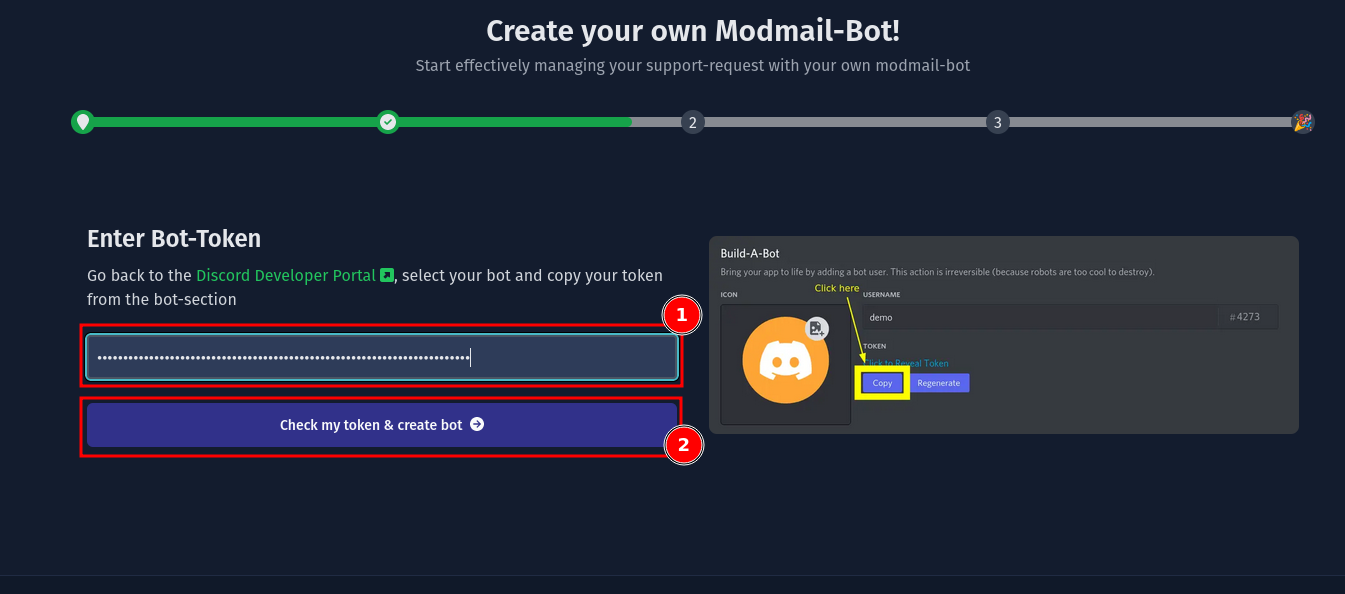
Als Nächstes wirst du dazu aufgefordert, den Token einzugeben, den du in Schritt 1 erhalten hast. Füge deinen Token dort ein und klicke auf "Prüfe meinen Token & erstelle den Bot". SCNX wird deinen Token überprüfen und dich zum nächsten Schritt weiterleiten, falls der Token gültig ist.
Nun kannst du ein paar Standardeinstellungen vornehmen. Als Erstes musst du eine Kategorie auswählen, in welcher dein Modmail-Bot später Tickets erstellen soll (du kannst dieses später ändern). Die Rechte des Discord-Kanals werden mit der Kategorie synchronisiert. Wenn du damit fertig bist, musst du einen Log-Kanal auswählen. Logs von geschlossenen Tickets werden in diesen Kanal zusammen mit wichtigen Informationen gesendet. Wenn du diese beiden Sachen eingestellt hast, klicke auf "Modmail-Bot erstellen".

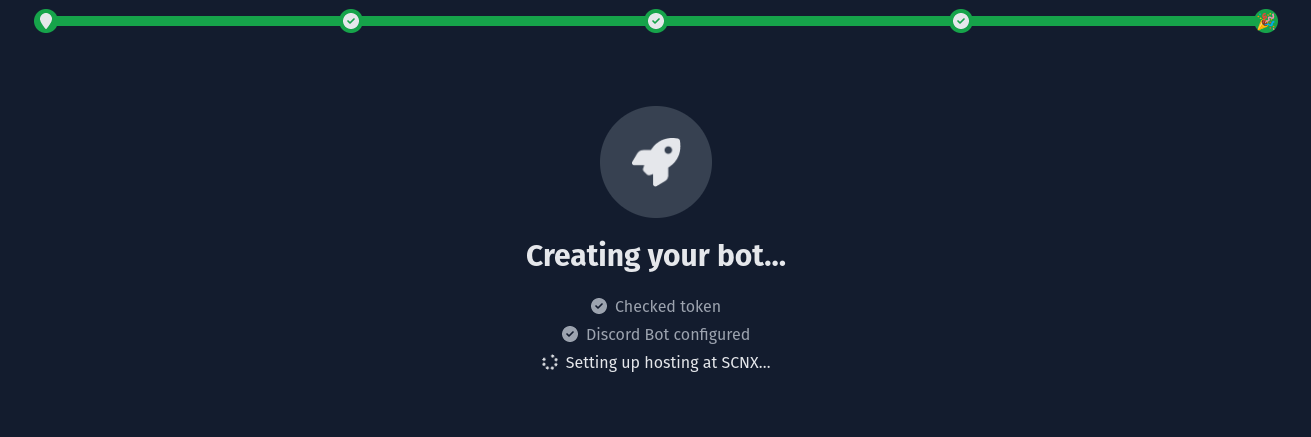
SCNX wird nun die Verwaltung für deinen Modmail-Bot einstellen
und deinen Discord Bot automatisch einstellen.
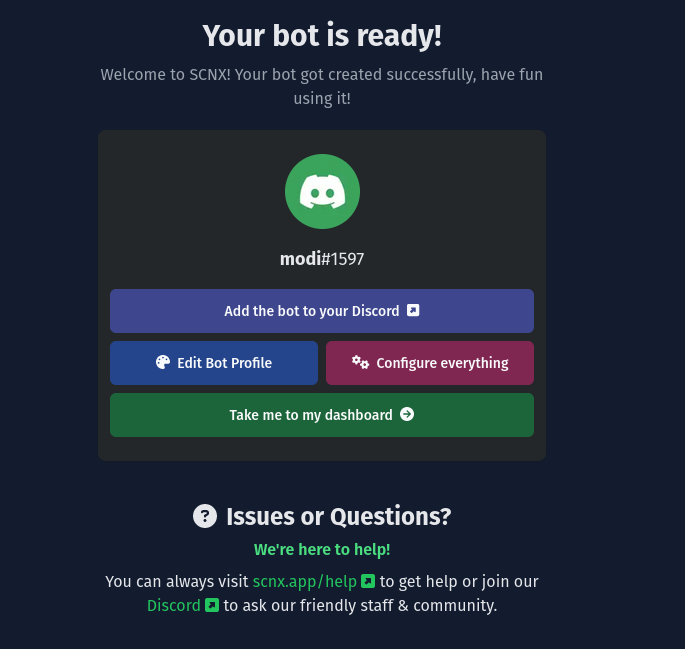
Nachdem SCNX deinen Modmail-Bot eingestellt hat, musst du deinen Modmail-Bot auf deinen Server einladen. Um dies zu tun, musst du nur auf den "Füge den Bot zu deinem Discord Server hinzu"-Knopf. Dies wird ein Fenster öffnen. SCNX hat bereits deinen Server ausgewählt. Klicke einfach auf "Weiter" und "Autorisieren" um den Prozess fertigzustellen. Wenn du möchtest, kannst du die "Administrator" Berechtigung entfernen, aber dies wird es schwieriger machen, den Bot normal zu nutzen, da SCNX noch nicht zeigen kann, welche Funktion welche Berechtigung benötigt und Fehler, die auf fehlende Berechtigungen zurückzuführen sind, zu erkennen.
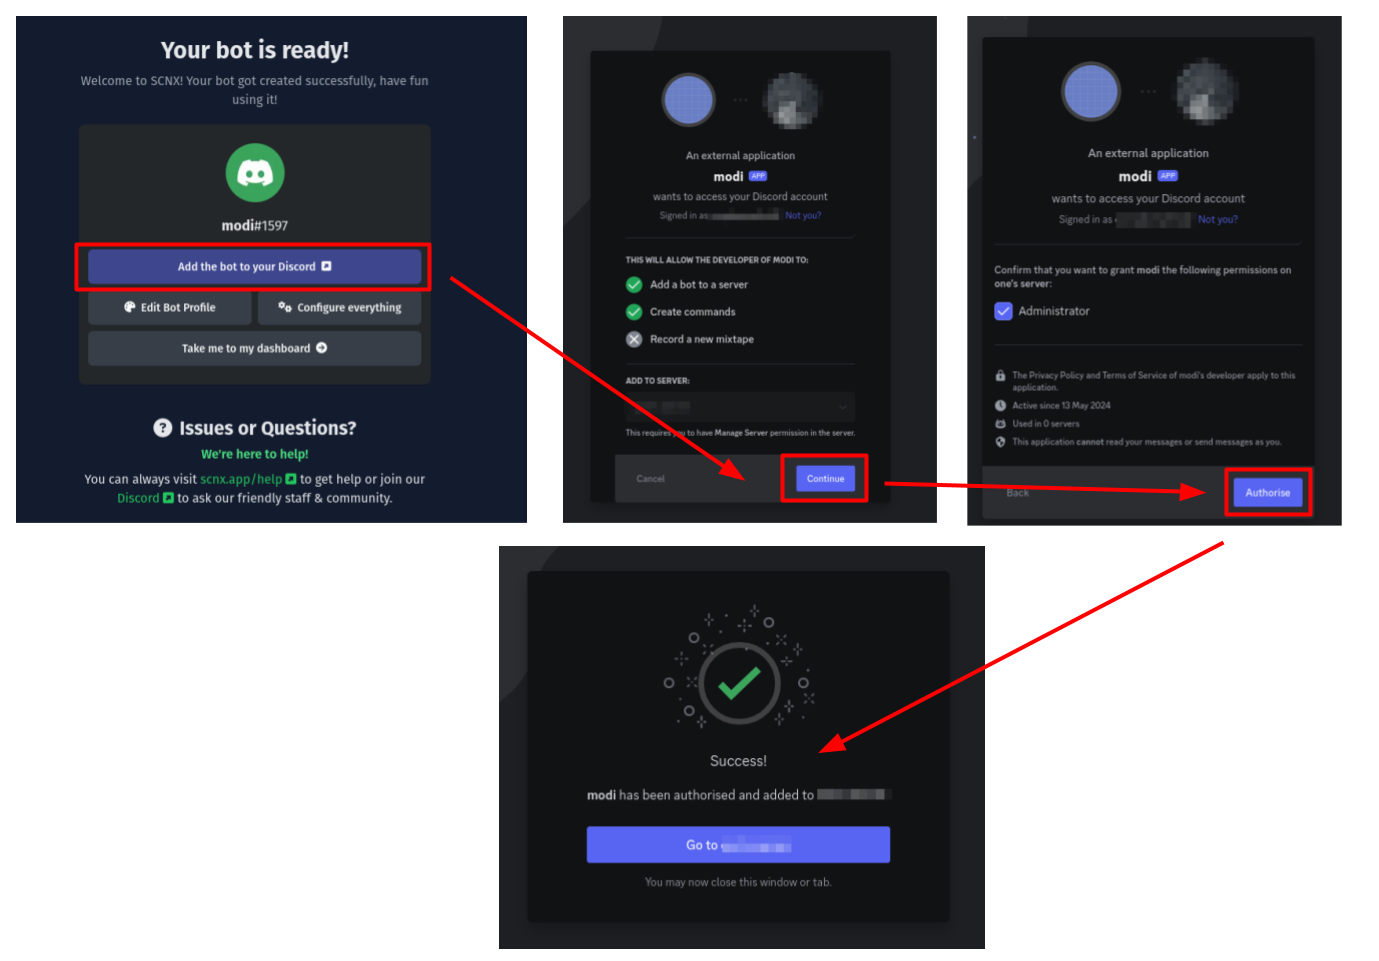
Wenn dies erledigt ist, ist dein Modmail-Bot vollkommen auf SCNX einsatzbereit. Kehre zu der Einrichtung zurück, um das Profil mit dem "Profil bearbeiten"-Button zu bearbeiten. (du kannst dies auch später machen), stelle deinen neuen Modmail-Bot ein oder erkunde alle Funktionen deines Modmail-Bots.
Wir haben eine Anleitung zur Fehlerbehebung für Modmail-Bots für dich erstellt. Wenn diese Anleitung zur Fehlerbehebung nichts bringt, helfen wir dir jederzeit hier: scnx.app/help.
3. Genieße deinen neuen Modmail-Bot🎉
Wenn du alles richtig gemacht hast, sollte dein Modmail-Bot jetzt online auf Discord sein. Dafür kannst du dir jetzt mal auf die Schulter klopfen 💪. Du hast gute Arbeit geleistet und kannst nun das Universum eines hoch fortschrittlichen und voll anpassbaren Modmail-Bot für deine Community erkunden - es ist nicht nur ein Modmail-Bot, es ist DEIN Modmail-Bot.
Hier sind ein paar Dinge, die du jetzt tun könntest:
- Teste deinen Modmail-Bot: Sende ihm eine Privatnachricht und beobachte, wie er ein Ticket öffnet, in dem dein Team mit dir schreiben kann.
- stelle deinen Modmail-Bot ein und aktiviere mehr Modmail-Funktionen.
- Verbessere dein Support System, indem du fortgeschritte Modmail-Funktionen erkundest.
- und sehr viel mehr. Öffne die Modmail-Documentation, um dir jede Option anzuschauen.